Welcome to The 1997 Terrestrial Fly swap,This Swap was conducted through two news lists that I subscribe to, The Flyfish and the Flytie lists (for subscription info check out the links at the bottom). What is a terrestrial Fly ? Its is a imitation of a land born insect (like a Beetle or Grasshopper). What is a fly swap? It is when someone suggests the swap of a certain fly type,they usually decide to host the swap By be coming the swapmeister and compiling a list from interested parties in groups of twelve.You Tie twelve of the same fly and you receive twelve different flies.Some of the pictures are not the best and will be replaced as soon as I can
STEEVES FIREFLY TURBO WASP FOAM WASP BLACK GNATS
HIGH VISIBILITY BEE HOLE PUNCH BEETLE A.K. BEST"S BUGSKIN
FOAM BULLET HOPPER PEACOCK BEETLE
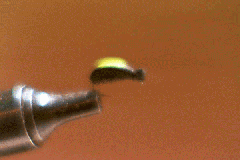
Over the past 3 years this simple fly has been my
most successful dry fly. Size 18 in particular
followed by a #16. I tie it in sizes 14-20.The only
material you need is a strip of closed-cell foam
1/8 to 1/4" wide.Depending on the size fly you are
tying,black 6/0 thread and flourecent
yellow or orange fabric paint
1. attach thread at eye and wind it to a point just into
the bend and back to above the hook point
2. attach foam strip above the hook point (the strip should extend out
back of the hook) and run
thread back into bend as before.
3.Run thread up to a point just behind the eye of the hook.
4. Fold foam strip over and tie down. Take a few wraps in front of and
under the foam just behind the eye
5. Cut off foam at the same angle as the hook eye (unless it's
a ring eye hook.)
6. Whip finnish at a point you tied off the folded over foam strip
7. Apply dot of fabric paint ( large or small it dries fairly quickly)
The directions took longer to write than it takes to tie this fly
Aaron Hirschorn
afhirsch@aol.com
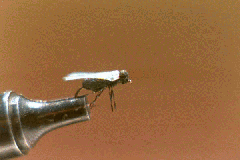
Hook: 10-16 dry fly(94840 Mustad)
Thread : black
Top Body : 1/8 inch black closed cell foam
Underbody : peacock herl
Wing : clear holographic "Paper Twist" available
from a craft store
Instructions
1. place hook in vise.
2. Wrap with thread from midshank
3. Tie in 1/4 inch wide by 2 inch long piece of black foam and
put a bit of cement on it as you tie it down so it will stick in place
without twisting on the hook.
4.Tie in 3-4 peacock herls and twist with the thread to make a chenille
rope. Wind to about 1/2
shank length. TIE DOWN BUT DO NOT CUT OFF THE PEACOCK HERL. DO
NOT CUT THE PEACOCK HERL OFF UNTIL AFTER THE HEAD IS COMPLEATLY
MADE. TRUST ME...I'LL TELL YOU WHEN TO CUT IT OFF. DON'T DO IT BEFORE I TELL
YOU TO DO SO.
5. Tie in a strand of color 15 krystal flash which you have made into
a figure eight and then one strand back again..ie, when cut you
will have three legs on each side.This should be three inches long and
folded into a pushed together S of about 1 inch length.
6.Pull the foam over the top of the hook and tie down in front of the legs
you've just put on.
7.Twist herl with thread again and move up to about 1/2 of
the remaining hook length left bare.Tie off the herl gut
leave hanging.
8.Bring foam over this and tie down again and wind forward over the foam
to the eye leaving the foam sticking out over the hook eye. DO NOT CUT
THE FOAM OFF YET.
9.Twist the herl with thread again and wind over the foam head area
of foam and tie down. Now cut off the peacock herl.
10.Bring the foam back over the peacock herl to the 1/4 area mark making
a head of foam. Tie it down and cut it off now.
11.Untwist the paper twist and flatten it.(I iron mine with a very
low temp iron so it is flat). Cut out a heart shaped wing that
is about one hook length long..
12.Place the wide part of the heart of the wing toward the back of the
hook and measure it so it comes to the back of the hook bend.Mark it
by the head with your fingernail.
13.Now, holding the wing so the wide part faces out over the eye
of the hook, tie it in behind the head on the mark you've previosly
measured and marked with your fingernail. Bring thread underneath
fly and tie off at the eye of the hook
14. Put a drop of cement on the back of the top of the butt segament of the
fly and bend the wing back so it is now in place with the wide
part of the heart over the back of the fly. (When horse flies are on the
water,streak the wing with your brown or black permanent marker).
15.Grab legs and hold down and trim to 1 1/2 hook gap. The fly is now
ready to fish.
This is a great imitation when there are flies on the water.It also works
well as an ant pattern
(don't ask me why) when tied in a size 16 and 14. I tie most in size 14.The
shimmer of the wing is easy to see in the sunlight and it floats like a cork.
HAPPY FISHING!
Joyce Westphal
westphal@burgoynene.com
Flying Ant
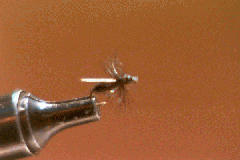
variation of AK Best and Harrop's patterns
Hook:Mustad 98040 size 16
body :fly rite black#2
thread: danville 8/0 black
black hackle
wing turkey wing coated with flexcement as wide as body and extended beyond
hook up to 1/3
tie in abdomen in egg shape about 1/2 of shank, tie in wing, 4-5 wraps of hackle, dub a rounded head, tie off real simple. Can do same with reddish/brown dubbing and brown hackle.
Steve Perry
sperry@willowtree.com
Orange Foam
Beetle
Imitating the ladybug.
The recipe is easy and is as follows.
Orange Foam Beetle
Hook: dry fly #10 to 18 (to match foam body length)
Thread: black;
Body: orange preformed closed cell foam, tyed in back and front only;
Hackle: black, palmered under the body and clipped short
Head: black.
You can use a fine black marker pen to put spots on top of the body.
Denis Lamy
Denis_Lamy@UQTR.UQuebec.CA
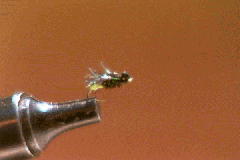
First of all, this pattern was created by
Harrison Steeves and is included in "Terrestrials"
by H. Steeves and E. Koch. Note, these
instructions for a #12 - #16 Firefly are printed
almost verbatim from "Terrestrials" - note, the
typos are mine, not from the book. To tie it in size
22 a few modifications were made to the pattern
- I'll include those where necessary.
Here goes:
Hook: #16 - #16 Mustad 94831 or equivalent
Thread: Black or orange 6/0 (8/0 or 12/0 for size 22)
Body: 1/8-inch thick black closed cell foam, cut into 1/8-inch wide strips
(slightly smaller for size 22)
Underbody: 2 to 4 strands of peacock herl, depending on hook size (for size
22 use herl with very short fuzz or herl from the eye of the peacock
feather)
Butt: Krenik fluroescent medium round braid, yellow, #054 (Steeves recommends
splitting the round braid and using just a few fibers for the butt. I used
enbroidery floss for the swap flies and fl. yellow or green floss or thread
would likely also work well)
Wings: Kreinik 1/8-inch flat ribbon or heavy round braid, mallard, #850 (split
fibers of flat ribbon in half for a size 22 fly)
Wing Case: Krenik beetle black, 1/8-inch wide flat ribbon, #005HL (I left
this off - did not have appropriate size ribbon or good substitue)
Instructions:
1. Wrap first half of hook shank with thread, tie in wing case material to
the bend of the hook. Wrap thread forward two-thirds the length of the hook
shank.
2. Tie in body foam and continue to tie it in back to the bend of the hook.
This will prevent the body from turning in the hook shank.
3. Wrap the thread forward about 1/8-inch and tie in a 6-inch piece of butt
material. Form the butt in a #14 fly by wrapping the butt material three
times and tying it off. Remove excess. On a #12 fly, four wraps of butt material
are necessary. On a #16 fly, only two wraps of butt material are called
for.
4. Tie in peacock her just ahead of butt, and wrapp thread forward to 1/16
inch behind hook eye. Wrap peacock herl forward and tie down. Wrap thread
back and then forward through herl to reinforce it.
5. Fold body foam forward and tie it down about 1/8 to 1/16 inch behind the
hookeye (depending on size of the fly). Cut the forward-projecting foam even
with the front of the eye to form the head.
6. Tie in a piece of winging material projecting backward to the fluorescent
butt. Trim the forward portion flush with thefront of the head. Separate
the winging material into equal portions on either side of the body.
7. Fold the wing case material forward between the wings and tie it down.
Trim excess flush with the head of the fly. Whip finish
------------------------------------
Steve Davenport
sdavenpo@avana.net

Pattern details for Turbo Wasp
Taken from TERRESTRIALS by Ed Koch
and Harrison Steves
Hook : 94831 (94840 used ) #14
Thread : Yellow
Body : Yellow floss
Overbody : Black dryfly foam
Legs : Moose mane tied long on both sides past
the end of the body
Wings : White quill
Thorax : Black dry fly dubbing
Robert Shearer
shearer@usf.teradyne.com

This way to tie a hornet was
developed by Olof Jacobsson.
Fish like it, you
don't have to use grease
and it wont sink for the hole day.
Material:
Thread: black
Hook: dry-fly hook No 10
( I use Mustad 94833 )
Body: Yellow and Black Foam
( polycelon, 3 sheets black, 2 sheets yellow )
Hackle: Black ( I prefer hen, because it is soft and moves easily)
Glue: 3M Super Spray 77
1. Take the foamsheets and glue them together,
black/yellow/black/yellow/black. For gluing follow the instructions on the
spraybottle.
2. When the foam are dry ,take a tool that you make holes in leather with,and
screw
it trough the foam. It dont work if you try to cut it out with a hammer.
The diameter should be around 6mm.
3. Cut a notch with a razorblade. Put glue in the notch and put the hook
in
the notch. Leave 5 mm for the hackle between the body and the hookeye. Let
it dry.
4. Wrap the hackle, whip-finish
Lars Arned
l.g.arned@stockholm.mail.telia.com
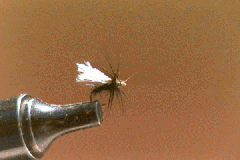
Hook : Partridge L3A #18
Thread : Black
Body : Black Mole Fur
Wing : White Antron Body -Wool
Hackle : Black Cock
Gavin Ross
GavRoss@aol.com
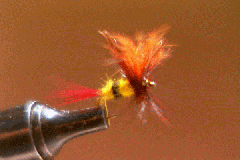
Hook :dry fly 10 to 14
Wing : Flourecent Orange Calf tail
Tail : Red hackle tips
Body :yellow-black-yellow
Hackle : Brown
Cut a clump of calf tail ( I like to usesize to match the hook size you are using,even the tips up and tie it in it should be the hook length.Lift the clump and wrap in front of the clump to stand it up ,then separate into two sections(try to make as even as possiable) wrap in between the clumps to separate, Then make a few wraps around each wing to strengthen,move thread towards the hook bend.Take a clump of red hackle tips and even them up then tie them in ( I prefer a little larger than normal clump). Then dub a section of yellow, a section of black then finnish up with yellow up to the wings .Take your brown hackle and strip a 1/8 to 1/4 inch of fibers from the stem then tie it in by the butt in between the wings with the tip pointing out over the bend of hook, Then make about two wraps behind the wing then in between the wing and in front of the wing ,tie off and trim the hackle and whip finnish
Dennis Veto (swap meister)
bove@wi.net
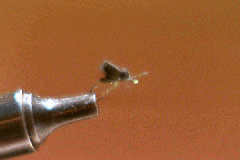
Spawned from the hole puncher of:
Bob Perry
rperry@Suffolk.lib.ny.us
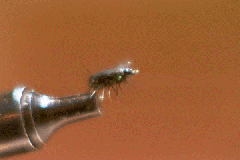
This pattern is found in A.K. Best's book
A.K.'s Flybox. I like itbecause it has a
classic look to it and because the fish like it too.
It supplements the high-floating foam beetles
that are in my fly box. It can be tied in a
number of colors to represent beetles
found in your area. I tie it in black and
brown. You can tie it with a dubbing
underbody which floats fairly well or
tie it with a peacock herl underbody
and it will float just below the film.
Materials:
Hook: Std. Length dry fly (#16 Tiemco 101 in example fly);
I tie them in sizes 14-18
Thread: 8/0, color to match bugskin "shell"
Underbody:
Version 1 -- dubbing to match or slightly contrast the bugskin "shell"
Version 2 -- peacock herl (tied in example fly)
Hackle: rooster neck or saddle, color to match bugskin, sized for hook
Overbody (shell): strip of bugskin, black or color to match local insects
some people may not be familiar with the Bugskin material it is a very thin
leather produced for stonefly wing cases and crawfish backs. Kaufmann's
Streamborn and Feathercraft offer it in
their catalogs.
The bugskin should be cut to the following widths for these hook sizes:
#14 -- 3/16"
#16 -- 5/32"
#18 -- 1/8"
An Exacto knife and a straight edge make the job easy. Cut the bugskin
strips to a point by making two cuts at 45 degrees. The point will be
used to tie the strip on to the hook.
Tying instructions for the example fly (paraphrased from A.K. Best's book
(A.K.'s Flybox):
Note - If a dubbed underbody is preferred, simply substitute dubbing for
herl in the steps.
1. Wrap thread from two hook eye widths back from eye to end of shank
(beginning of bend), then wrap back up to even with the hook point.
2. Tie in the bugskin strip by the point that you cut with the shiny side
of the bugskin against the hook. Tie it down to a point slightly down
onto the bend of the hook. Wrap the thread forward to the a spot even
with the hook point.
3. Tie in 3 to 4 peacock herl. Wrap the thread (tie them down) back the
the hook bend.
4. Wind the peacock herl around the thread a few times to give it
strength. Wind the thread/herl forward to form a peacock herl ball in the
area between the start of the hook bend and the spot even with the hook
point. Tie off the herl with a few thread wraps.
5. Tie in the hackle (by the tip if a neck feather, by the butt if from
a saddle) at the spot even with the hook point.
6. Wrap the herl forward to a point two hook eye widths back from the eye
and tie off.
7. Wind the hackle forward Palmer style up to where the herl is tied off
and secure with a couple of thread wraps. Clip the hackle from the top and
bottom of the fly.
8. Stretch the bugskin over the top of the fly. You can still probably rotate
it slightly to make sure it is on the top of the hook and adjust the tail
end to make a rounded shape over the herl ball. Tie the bugskin down at a
point about one to two hook eye widths back from the eye.
9. Clip the bugskin off as close to the tie off point as possible and tie
it down to make a head for the fly. Whip finish and head cement.
A floatant like Gink works well with the fly. If you try it out, I would appreciate knowing how it fished for you and under what conditions. Have fun.
Chuck Thompson
chuckthompson@juno.com
Back to the Top
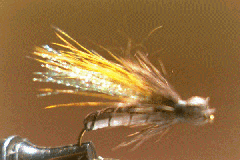
Tying Instructions Foam Bullet Hopper
Hook: 2x Long Dry Fly size to choice I prefer size six.
Thread: Black 3/0 or Monocord
Thorax: White and Brown 3mm closed
cell phone (Foamies at craft shops) cut
cut into 1/8" strips
Underwing: Crystal Flash--Your choice
Over wing: Dyed Olive Deer Hair
Head: Natural Medium fine Deer Hair
Start thread and wind to bend and back to ~2/3 length of the hook shank
near
the eye. Tie in brown foam extending rearward for 2/3 length of the the
shank. Stretch the foam firmly as you tie rearward. Make a thread loop at
the hook bend (rib) and wind thread back to the 2/3 point binding the foam
tightly as you go. Tie in the white underbody in the same manner. Wrap the
white foam in in a clock wise motion to the 2/3s point stretching as you
go
tie off and clip excess. Pull brown over body forward to the 2/3s point
stretching lightly tie off and clip. Wind rib clock wise forward with
enough
tension to bunch the foam into segments tie off clip. Tie in ~ 8-10 strands
of crystal flash trude style to form the under wing. Tie in the olive deerhair
wing in the same manner and trim the butts angling towards the
hook eye. (under and overwing should be slightly longer than the hook
bend).
Bind all materials to form a smooth taper towards the head. Wrap thread to
2/3 between hook eye and foam body. Select pencil size bunch of natural
deer hair and stack for the head. Trim excess butts befor tying in.
Tie in with tip facing forward bunched completely around the hook shank.
Wrap forward toward eye slightly increasing thread pressure as you go.
Clip butts and smooth with thread wraps. Flair the hair by pressing your
index
finger on the hook eye and rotating your finger. Pull tips rearward and tie
to form the bullet head. Whip finish. Trim stray hairs. Bullet heads are
a
pain at first but become much easier with a little practice. As with most
fly patterns the material colors can be mixed for what ever color scheme
you
need to match the hopper in your area.
W. Miller Williams
hico@usit.net

Hook : dry # 16
Body : peacock herl
Hackle : grizzly,trimmed on top
Wing pad : turkey treated with flexament
& tinted with gray marker
Place a small dry fly hook in your vise.
I used a # 16 mustad hook.
Wrap the base with thread (olive 8/0).
Attach a section of turkey primary barbs,
4/5 barbs that have been treated with
flexament to hold them together,at rear of the hook.Attach this section by
the base in such a manner that a white portion of the slip will make the
wing pad.Next attach a grizzly dry fky hackle.Attach two peacock herl and
wrap to the head.Leave Enough room to tie off herl,hackle and wing pad. Next
wind the hackle to the tie off position and secure with three wraps. I usually
use a half hitch and a drop of glue here.Lastly trim the hackle from the
top of the fly and pull the wing pad forward and secure with soft wraps
at first, tightening as you go. After securing the wing pad in place
mark the back with a light gray marker (use other color if desired,
or a combination).When the fly is done coat the wing pad with flexament
then let it dry and recoat.up to a dozen coats for a shiney back.
Steve Trauthwein
saltwein@swbell.net
If you are interested in finding out more about the lists that I mentioned check out the following
FF@ This List
Is a great list for the exchange of ideas and information on Flyfishing
or tying.
There are an average of 1000 to 1500 subscribers so there is alot of messages
but it is Well worth the time.
Flytie list is a moderated list that is run from the people
at Fly Fishermans Virtual flyshop it
is dedicated to the discussion of Fly tying althou it does"nt have the
following of the FF@ list it is
still a great source for information
1996 Terestrial swap Here are last years Flies
And here is the link to my Home Page with outdoor type stuff
If you have any questions or comments bove@wi.net